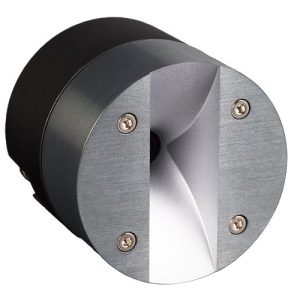
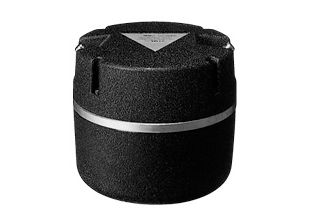
TAD DP-4001 Replacement Diaphragm
2 950,00 €
The TAD DP-4001 is a replacement diaphragm intended for loudspeaker repair. It must be selected by confirming the exact DP-4001 marking on the component being replaced, as the manufacturer’s name alone is not enough. The diaphragm is not a standalone audio system device: it is installed inside the loudspeaker being repaired, and the final connections depend on the speaker cabinet’s construction.
The TAD DP-4001 diaphragm is a replacement part intended for loudspeaker repair. It is used to replace a damaged diaphragm in the corresponding loudspeaker. Before ordering, make sure that the complete code on the old part matches DP-4001 exactly.
Purpose and correct selection
This replacement part is not a universal diaphragm for every TAD loudspeaker. A matching brand name alone is not enough to establish compatibility. Compare the entire code on the part being replaced, including every letter, number and hyphen.
The diaphragm is intended for repair work, not for constructing a new loudspeaker. It must be selected according to the specific loudspeaker component being replaced. Cabinet size, amplifier power or the type of audio system does not, by itself, confirm that this diaphragm is suitable.
Check the code directly on the removed original part or on its clearly preserved label. Do not identify the diaphragm solely by its shape, colour or appearance in a photograph. Parts that look very similar from the outside may be intended for different models and may not be interchangeable. If the marking is damaged or no longer readable, ask an audio equipment repair specialist to identify the component before you buy a replacement.
Careful identification at this stage helps avoid choosing a part merely because it appears similar. The relevant reference is the exact marking on the component being replaced. If several loudspeakers in one system require attention, check the diaphragm code in each loudspeaker separately rather than assuming that every unit uses the same part.
Connections and installation
A replacement diaphragm is an internal loudspeaker component, so its selection is not determined by the external connectors used elsewhere in the audio system. Its electrical and mechanical connections depend on the construction of the loudspeaker being repaired. Those construction requirements must be followed during installation and should not be altered arbitrarily.
Before beginning work, disconnect the speaker cabinet from the audio system and prepare a clean, well-lit working area. During disassembly, it is useful to record the positions of the wires, fasteners and original diaphragm. Photographs or clear notes can help preserve this information while the loudspeaker is apart. Keep the exposed loudspeaker protected from dust, metal particles and accidental mechanical damage throughout the repair.
Accurate diaphragm positioning is important during installation. The part should not be pressed, bent or adjusted by guesswork. Work carefully and follow the loudspeaker’s existing construction rather than forcing the component into place. An incorrectly installed diaphragm may not operate as intended, even when the replacement code is correct.
If you do not have experience with this kind of repair or are unfamiliar with the loudspeaker’s internal construction, installation should be entrusted to an audio equipment repair specialist. The diaphragm is a repair component rather than a plug-in accessory, and successful replacement depends on correct handling, positioning and connection inside the loudspeaker.
Use in an audio system
After the repair, reconnect and operate the speaker cabinet according to its own requirements. This applies in stereo, home cinema and multi-speaker systems. Replacing the diaphragm does not change the system’s connection arrangement, amplifier selection or user settings. The repaired cabinet remains part of the same audio system and should be treated according to the requirements that already apply to it.
The speaker cabinet can be returned to the position previously chosen for it. To make the first test easier to interpret, avoid changing its direction, placement or other system settings at the same time. Keeping the rest of the setup unchanged makes it easier to notice whether an unusual sound is associated with the repaired loudspeaker.
Begin the first test at low volume and use a familiar recording. Listen carefully for rattling, rubbing, distortion or any other sound that was not expected. The purpose of this initial check is to confirm that the loudspeaker is operating cleanly before normal use is resumed. If you notice any unusual noise, stop the test and inspect the installation. Do not attempt to compensate for a suspected installation problem by changing system settings or increasing the volume.
Technical specifications
| Manufacturer | TAD |
|---|---|
| Model | DP-4001 |
| Product type | Replacement diaphragm |
| Intended use | Loudspeaker repair |
FAQ
What is this replacement diaphragm intended for?
It is intended to replace a damaged diaphragm in the corresponding loudspeaker during repair. It is an internal repair component and does not operate as a standalone audio system device.
Will it fit any TAD loudspeaker?
No. The TAD brand name alone does not guarantee compatibility. The complete code on the component being replaced must match exactly.
Can it be connected directly to an amplifier?
No. The diaphragm is installed as part of a loudspeaker repair. The amplifier is connected to the repaired speaker cabinet in accordance with that cabinet’s connection requirements.
Who should install the diaphragm?
If you have no experience with this type of repair or do not know the loudspeaker’s construction, entrust the installation to an audio equipment repair specialist.
What should I check before ordering?
Read the code directly from the component being replaced and make sure it is DP-4001. Do not make your selection based only on appearance or the manufacturer’s name.
How should I prepare for installation?
Disconnect the speaker cabinet from the system, prepare a clean work area and record the positions of the wires and fasteners before disassembly.
How should I test the repaired loudspeaker for the first time?
Start at low volume and listen for clean sound. Check carefully for rattling, rubbing, distortion or any other unusual noise. If you hear anything unexpected, stop the test and inspect the installation.